
Making your own Objects is fun and easy, making it simple to design across drawings and projects, and helps you add a quick, personal style to your assets and presentations. You can create your own Object Packs with anything you draw and you can create as many packs as you want. Make Your Own Objects is a paid feature, available as part of the monthly or yearly subscriptions.
Creating an Object Pack
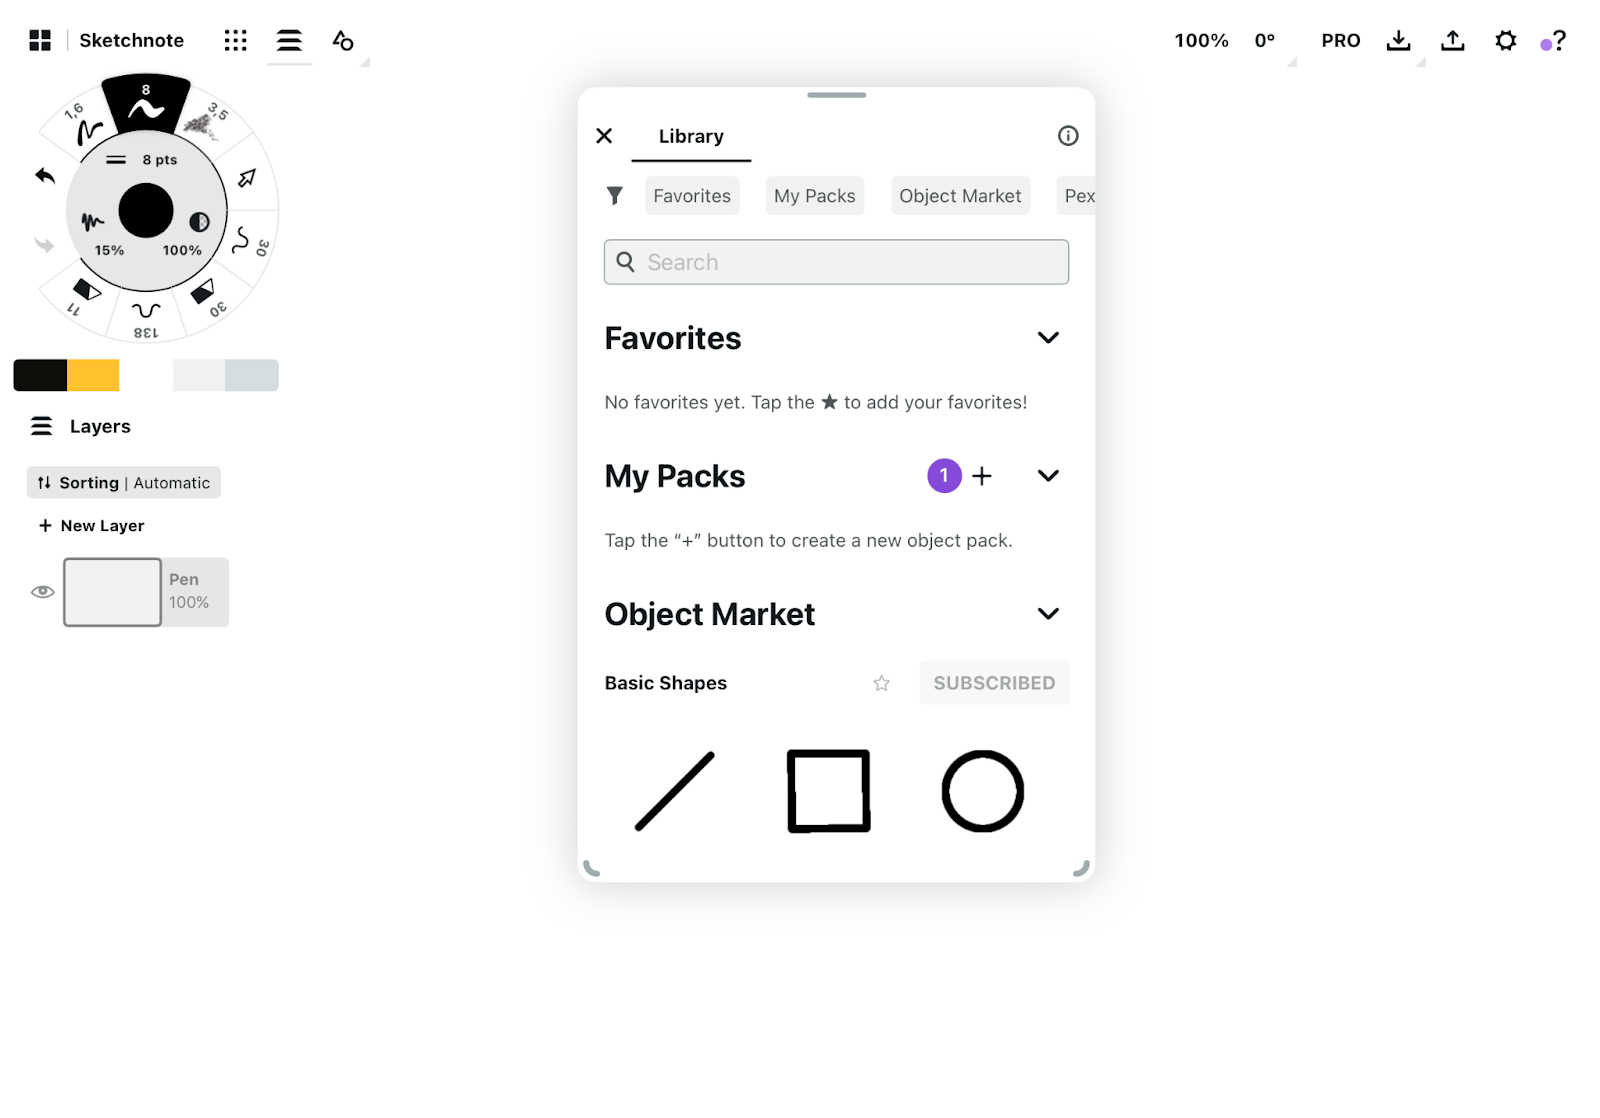
To create a new Object Pack, tap the + button at the My Packs section of the Object Library.
You will be prompted to name your Object Pack.
Once you’ve chosen a fitting name, tap Set Name.
You will be taken to the Pack View of your newly created Object Pack.
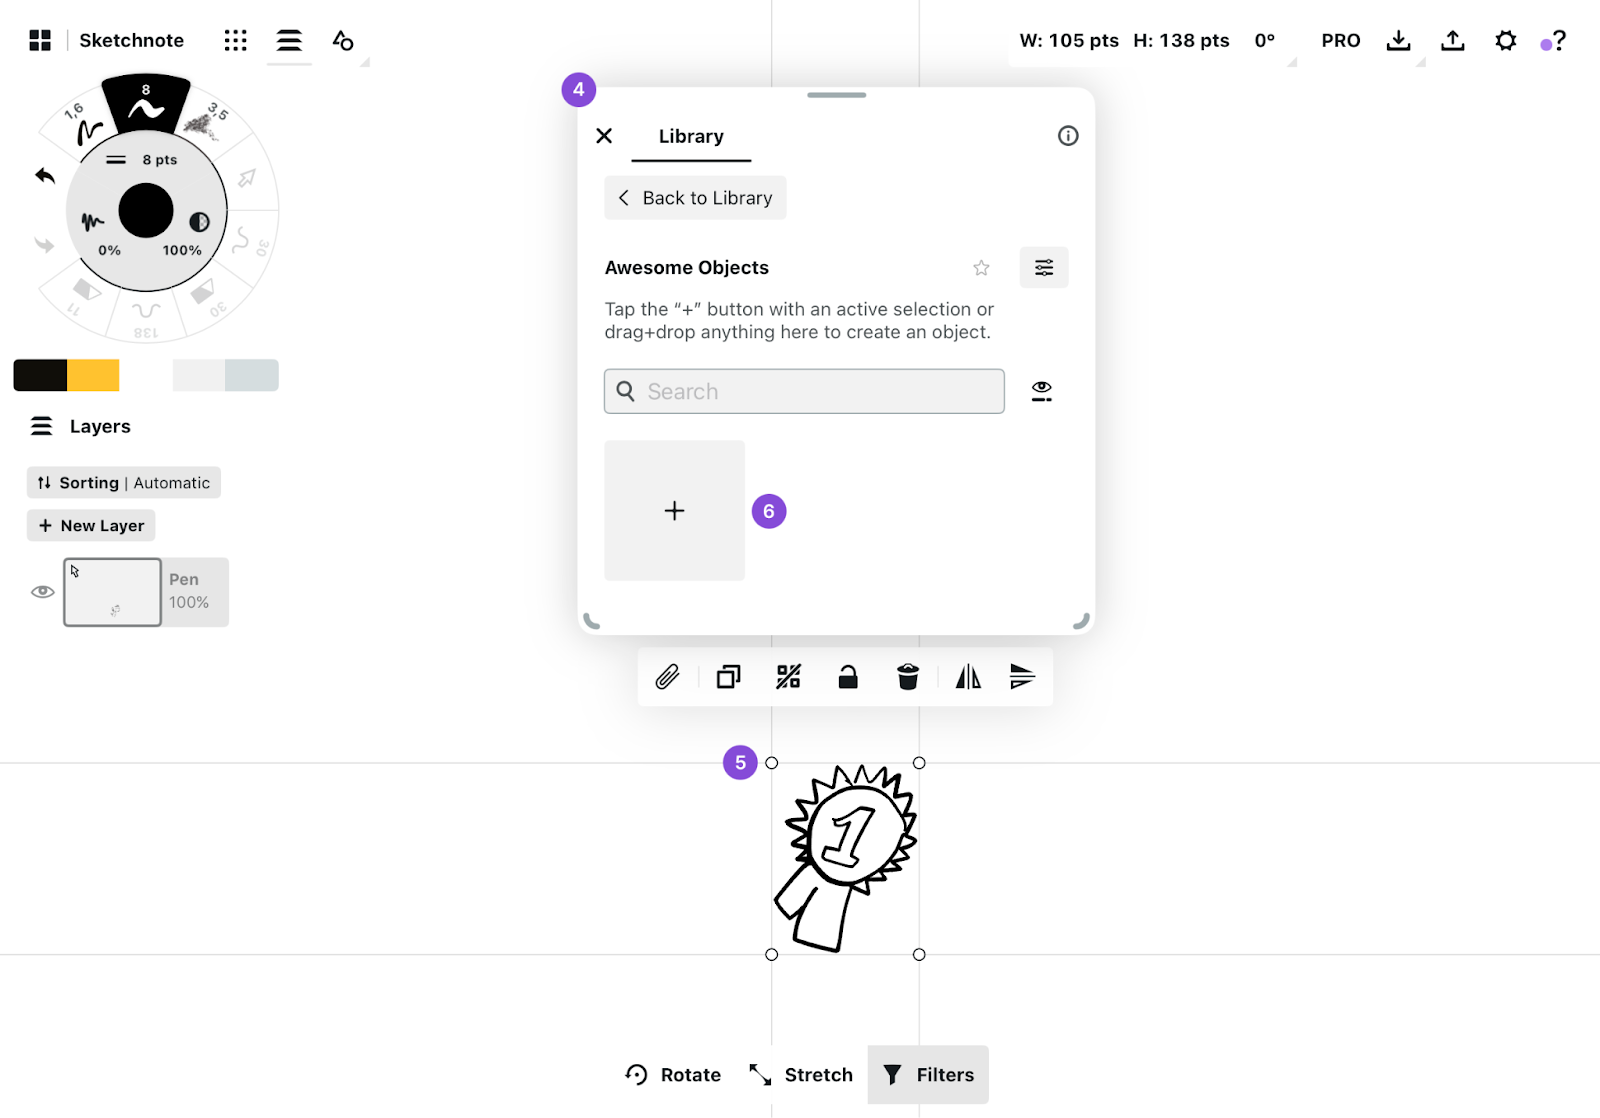
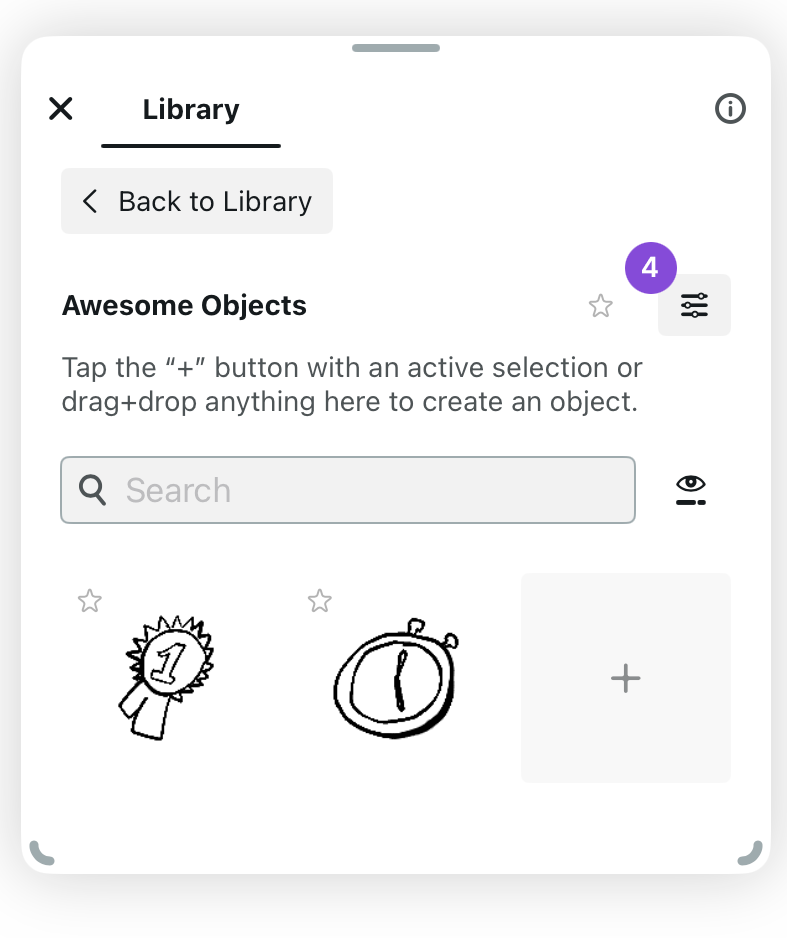
To create an Object, select the strokes you want, then Drag&Drop them anywhere in the Object Pack view. Once created, your Object will automatically group your strokes, so you can move and edit it more easily.
You can also tap the + in the Object Pack view when you have an active selection to add strokes as an Object.
Once you have added the items you want to your Object Pack, tap the Back to Library button.
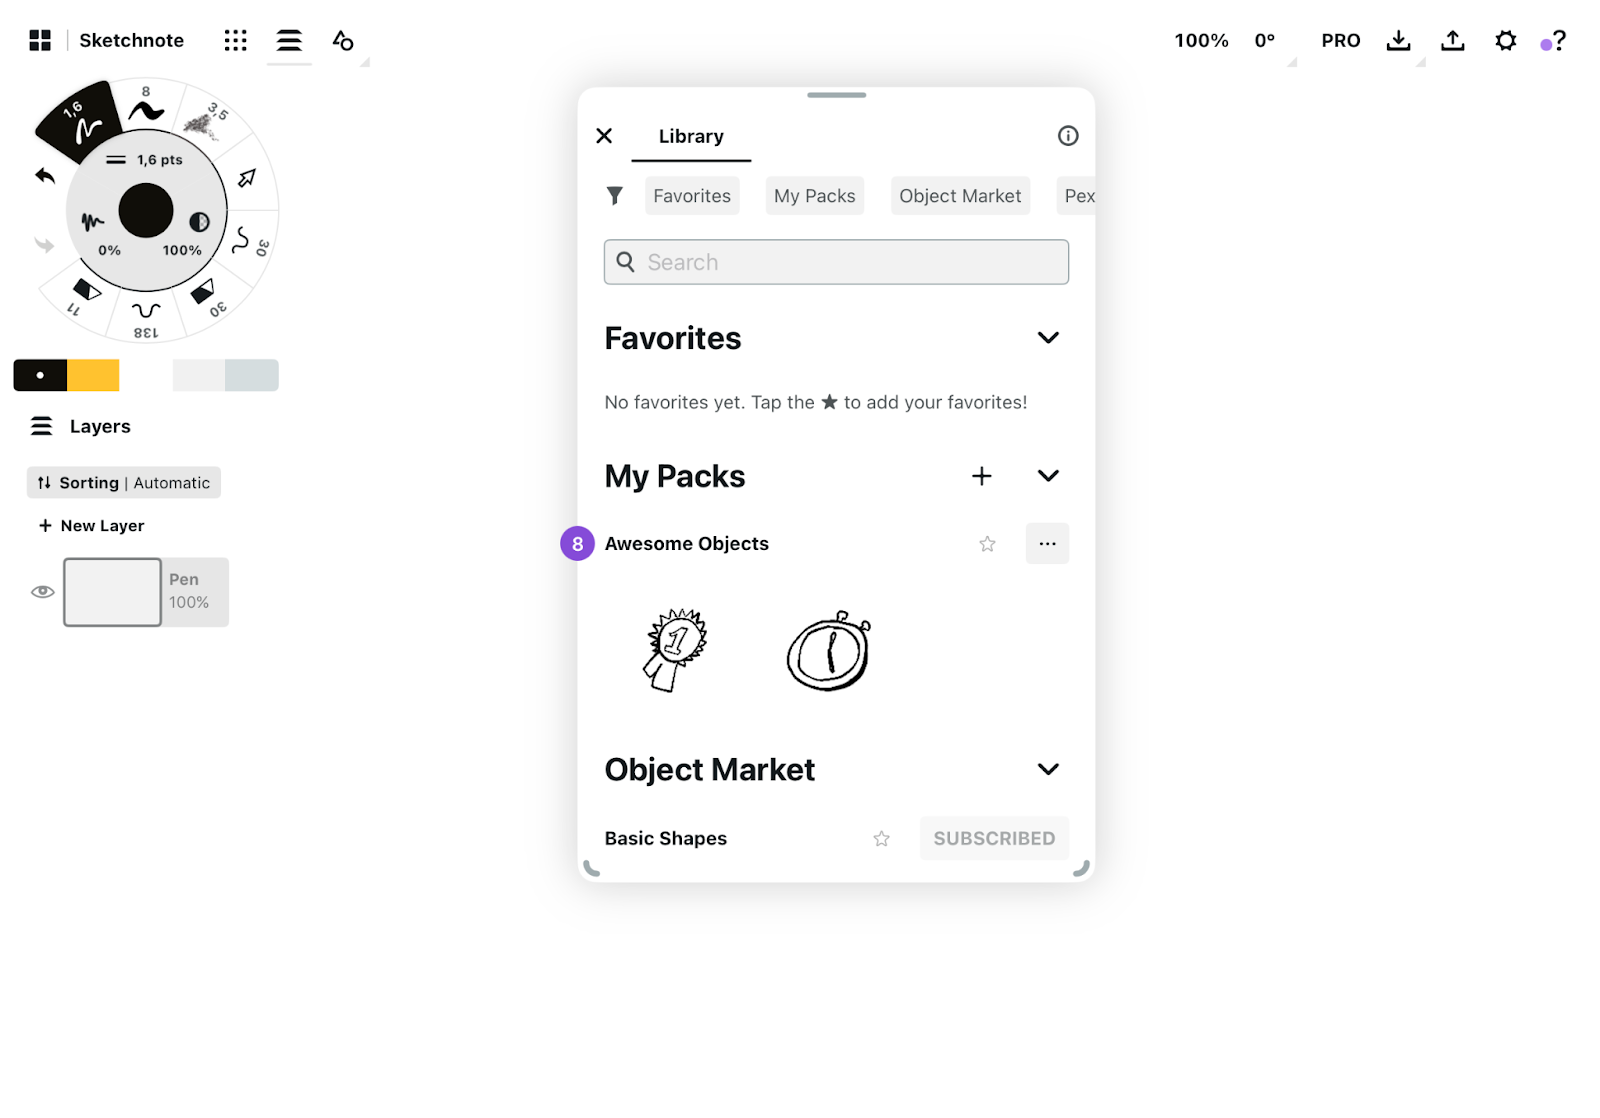
Your Object Pack will appear in the My Packs section of the Object Library. You can edit and add Objects to your Object Pack whenever you want. You can favorite your self-created Objects just as you would with other packs.


Editing Object Pack Settings
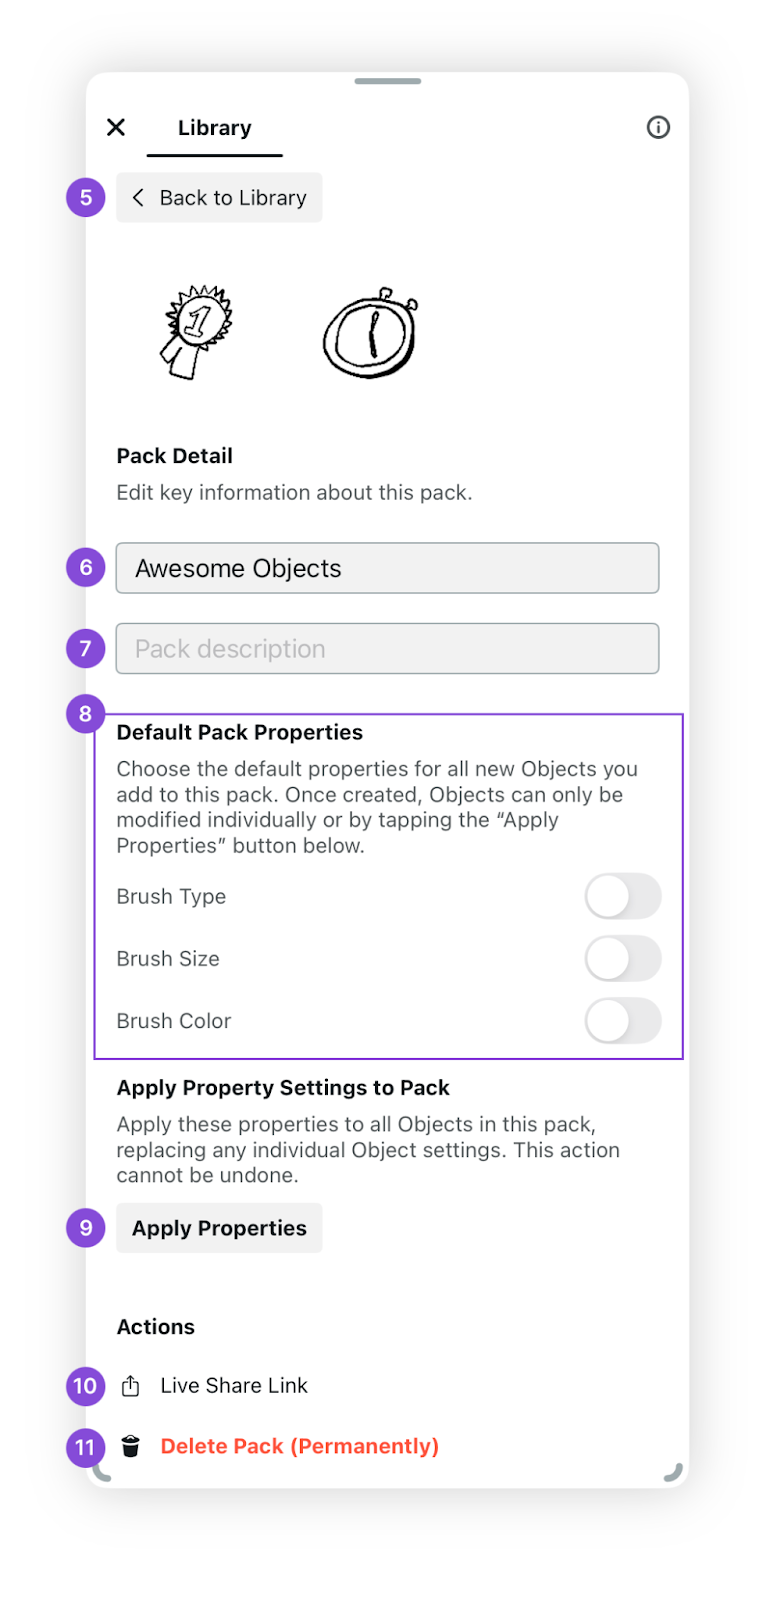
You can edit your Object Pack’s name, add a description or change the brush property settings at any time.
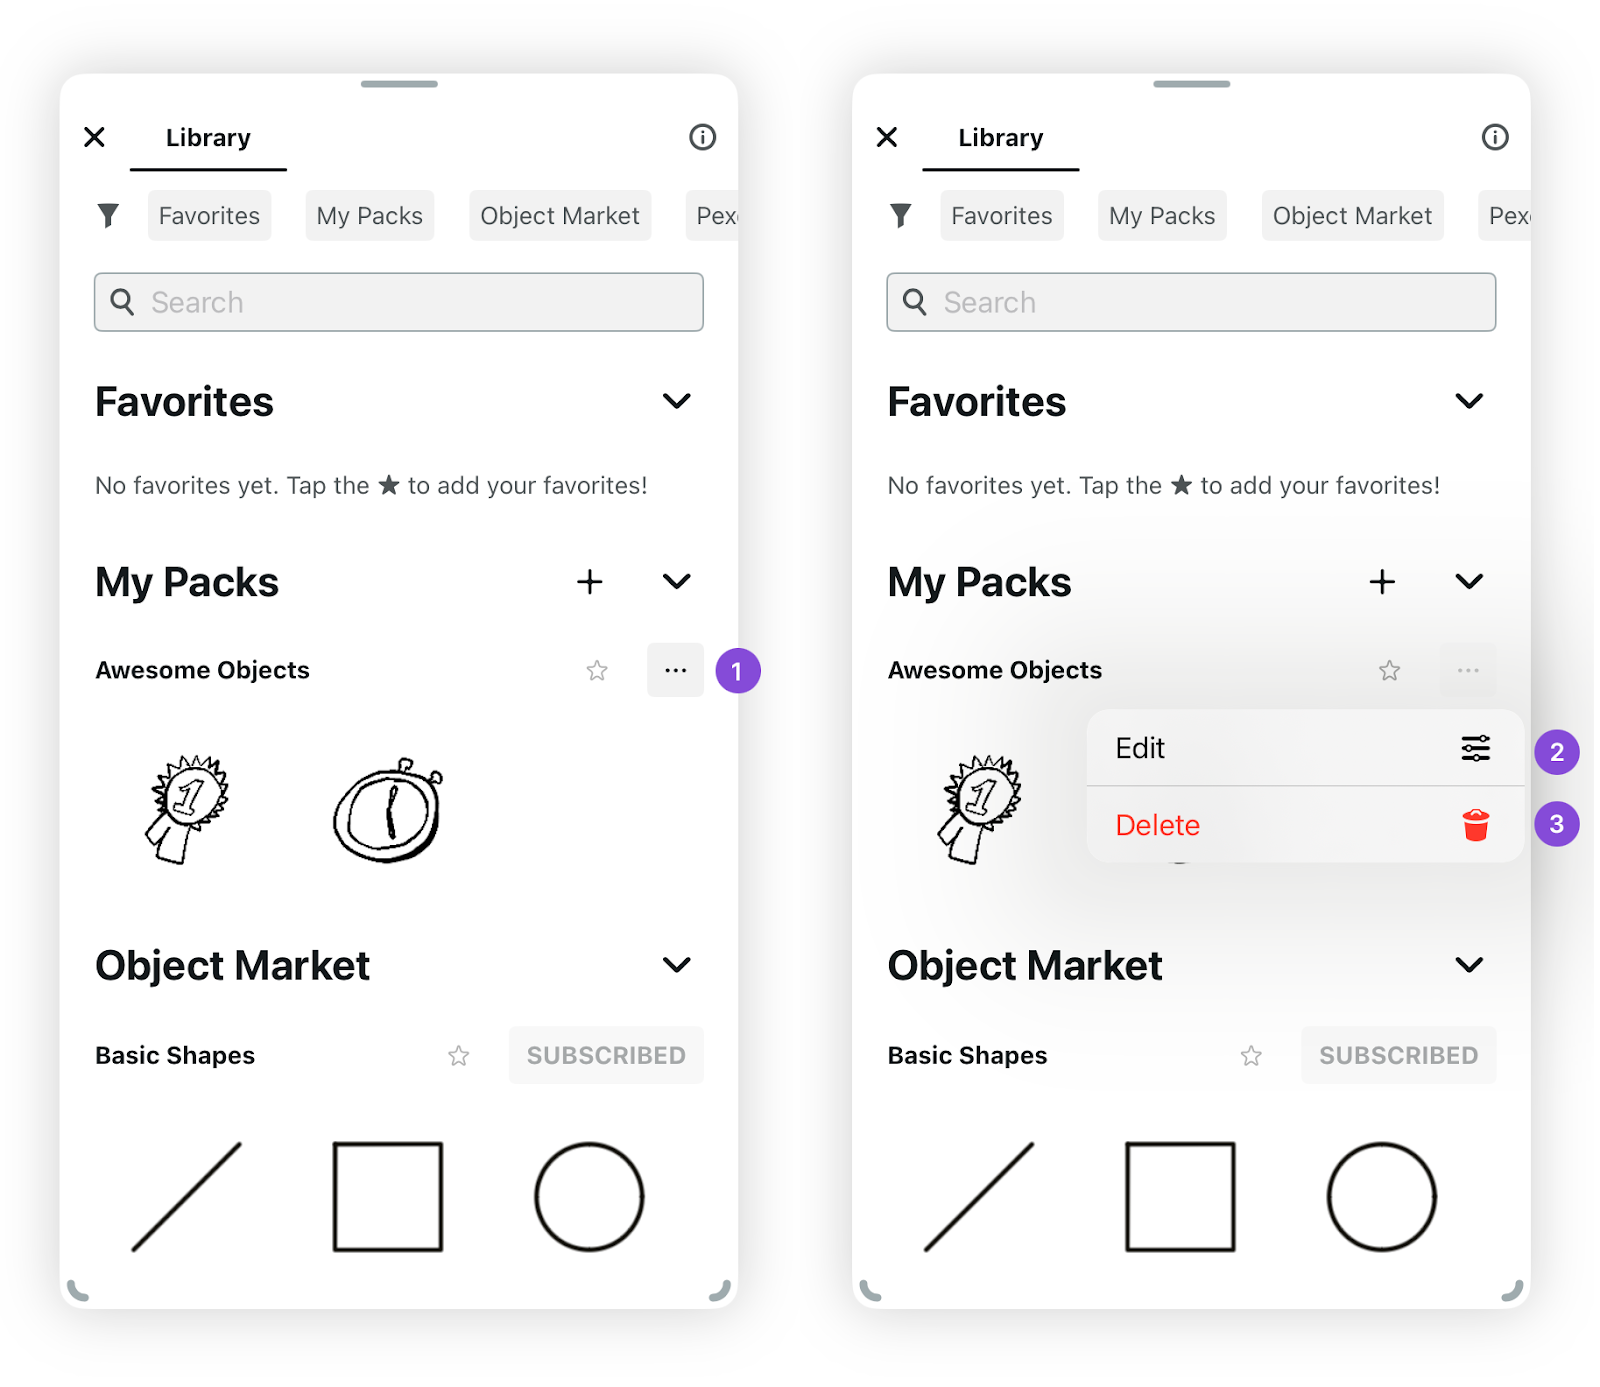
To start editing your Object Pack’s settings, tap the ... icon next to your Object Pack in the Object Library.
Tap Edit to access Object Pack settings.
You can also delete your Object Pack. Please note that this cannot be undone.
You can also access the Object Pack settings by tapping the settings icon in your Object Pack’s pack view.
In the Object Pack Settings, you will see all the options you can apply to your pack. You can get back to the Object Library / Object Pack View by tapping the Back to Library or Back to Pack button.
Change the Object Pack name you set when creating the Object Pack.
Add a description for your Object Pack. When using the search function in the Object Library, the search will also look for words in the pack description.
In the Default Pack Properties, you can choose which tool properties from the Tool Wheel affect the Objects you add to your Canvas. By default, your Objects will appear as you created them when added again on Canvas. By toggling the different options, you can decide whether the Object uses one or more properties from your currently active tool in the Tool Wheel. Do note that toggling the options will only affect new Objects in the pack, unless you tap the Apply Properties button.
Toggling Brush Type on will use the active tool in the Tool Wheel when adding an Object on Canvas.
Toggling Size on will use the active tool’s size in the Tool Wheel when adding an Object on Canvas.
Toggling Color on will use the active tool’s color in the Tool Wheel when adding an Object on Canvas.
Tapping the Apply Properties button will apply the chosen Brush, Size and Color property settings on all the existing Objects in the Pack.
[Available later this year] With the Live Share Link you can share the Object Pack to other users. Read more about Sharing Objects Packs here.
You can also Delete Pack to permanently delete your Object Pack. Please note that this cannot be undone.
Editing Object Settings
As with the Object Pack Settings, you can also edit your individual Object’s settings. You can edit the Object name, change the brush property settings and add search tags for your Object.
To start editing your Object’s settings, go to the Pack View of your Object Pack, and Tap+Hold on the Object you want to edit. This opens a context menu.
To edit the Object, tap the Edit option in the pop-up menu.
If you have an active Selection, you can also replace the current Object with the currently active Selection, by tapping the Replace With Selection option. Please note that this cannot be undone.
If you want to delete the Object, press the Delete option in the pop-up menu. Please note that this cannot be undone.
In the Object Settings, you will see all the options you can apply to your Object. You can get back to the Object Pack View by tapping the Back to Pack button.
You can move back and forth between the Objects in your current pack with the < and > buttons.
Here you can name your Object.
You can add tags to your Object. This will affect how the Object will appear when using the search function in the Object Library.
- In the Individual Object Properties, you can choose which tool properties from the Tool Wheel affect the object when you add it to your Canvas. By default, your Object will appear as you created it when added again on Canvas. By toggling the different options, you can decide whether the Object uses one or more properties from your currently active tool in the Tool Wheel. Do note that toggling the options for an Object will only affect this particular Object in the pack.
- Toggling Brush Type on will use the active tool in the Tool Wheel when adding the Object on Canvas.
- Toggling Size on will use the active tool’s size in the Tool Wheel when adding the Object on Canvas.
- Toggling Color on will use the active tool’s color in the Tool Wheel when adding the Object on Canvas.
You can also Delete Object to permanently delete the Object. Please note that this cannot be undone.